Mostly, when we want to see a thumbnail preview of a picture in the folder, we cannot see the picture previews without opening the file. In Windows 10 and 11, most photo previews are enabled by default. But in certain cases, you have to enable them manually. For this purpose, you must make some settings in your file explorer options. It’s quite easy to see the previews of your pictures. In this guide, I will show you how you can enable thumbnail previews of pictures for both Windows 10 and 11.
Follow these quick steps:
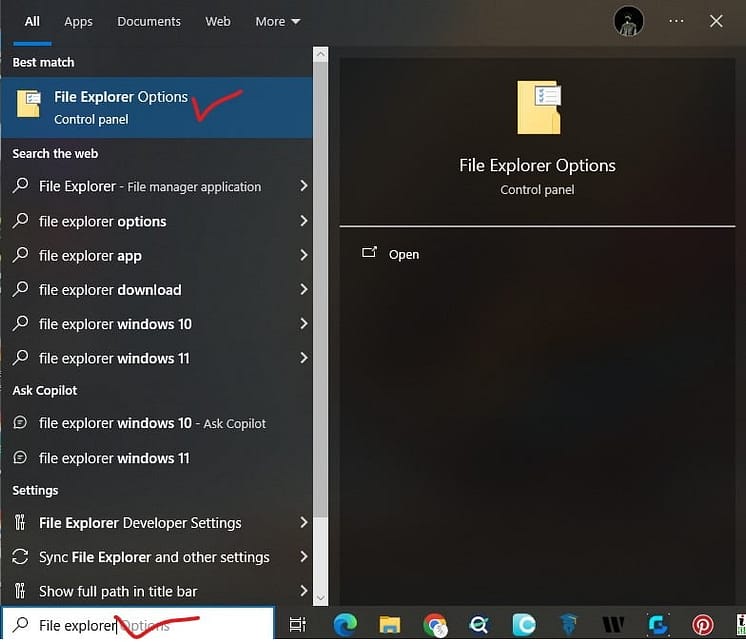
- Type File Explorer Options in the search box, and then press Enter.
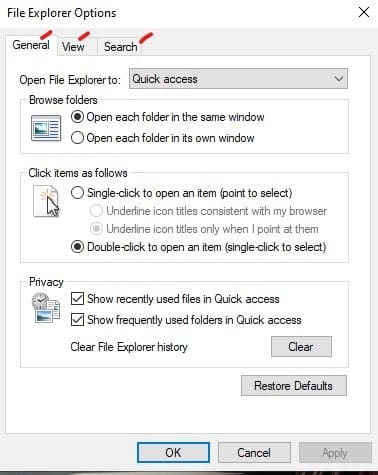
- You will see three options: “General, View, and Search.” You have to click on the View menu.
- Here you will see Advanced Settings options.
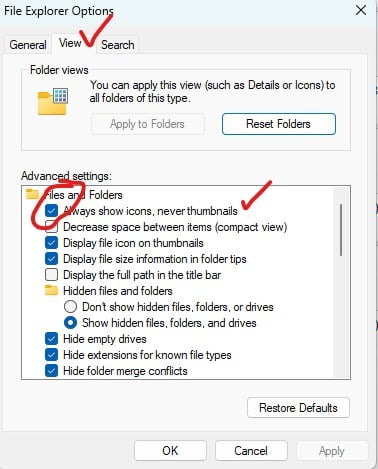
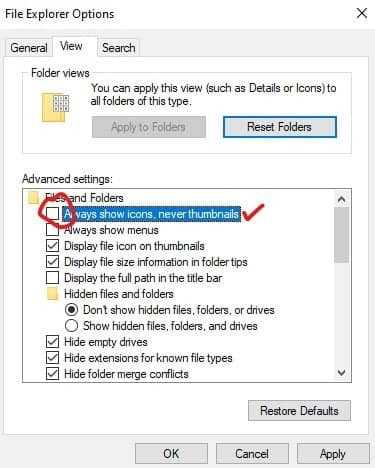
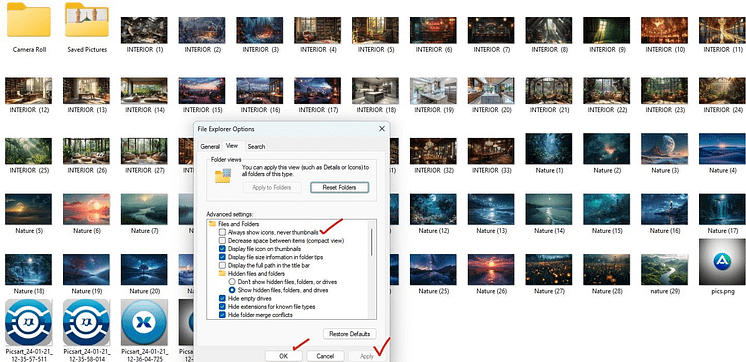
- If “Always show icons, never thumbnails” is checked, you must Uncheck this option.
- Click OK.
- You can select large icons, extra-large icons, or another preview mode.
Enabling thumbnail preview in Windows 10
First of all, we will see the method to enable image preview in Windows 10. Follow the below steps:
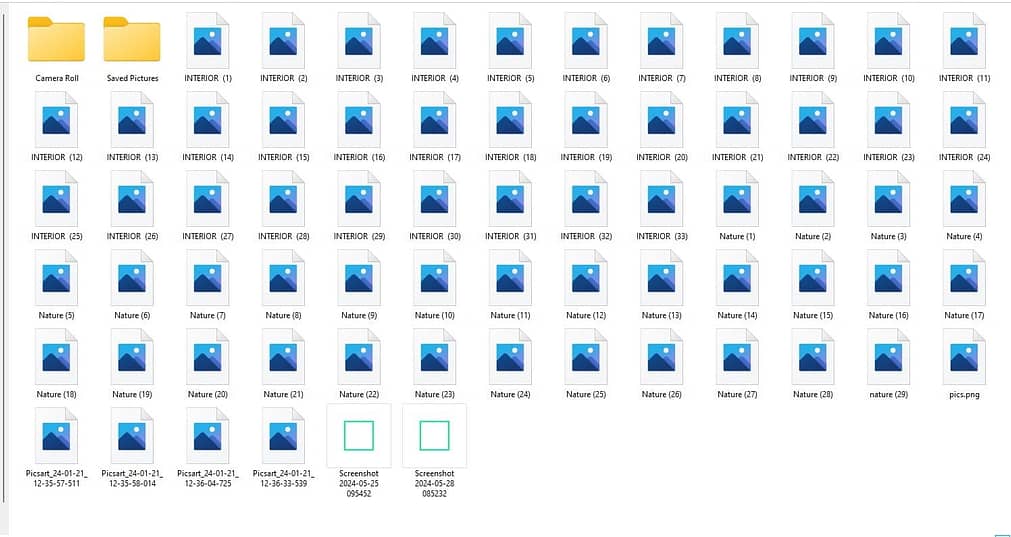
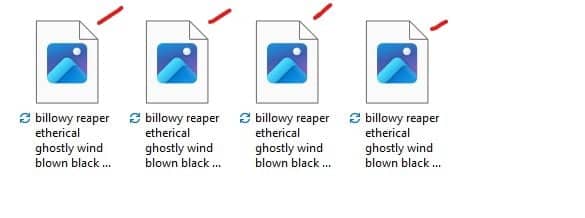
1. You can see I have image files, but we cannot see image previews.
3. You will see three File Explorer Options here: “General, View, and Search.” You have to click on the View menu.
4. Now click on the view menu. Here, you will see a lot of options. But in this article, we are discussing only the thumbnail preview that is not showing, so we will discuss only the desired options.
5. In Advanced Settings, you will see the option Files and Folders. In this section, you must uncheck the box “Always show icons, never thumbnails.” If this option is checked, you will see only image icons, but you cannot see thumbnails of images. Thumbnails are a quick way to identify and select the desired content. It’s totally up to you whether you want to see a thumbnail or not.
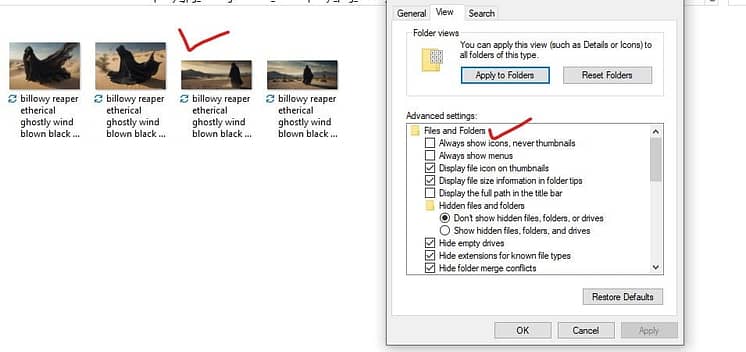
6. Click on Apply and press the OK button. When you click on the apply option, you will see thumbnail previews before clicking on the OK button. I have also put the image below for your convenience.
7. You must ensure your folder displays the proper viewing option. To do this, you must change the viewing options to large and extra-large previews.
Use Ctrl+A to select all images. Then press Ctrl+Shift+2 to see images with large preview icons. For extra-large icons, press Ctrl+Shift+1.
Enabling thumbnail preview in Windows 11
Secondly, we will see the method to enable image preview in Windows 11. Follow the below steps:
1. I have an Images folder but cannot see the thumbnail preview. If I enable the image preview option, it will be easy to identify images for me quickly. You can see the images given below without a thumbnail preview.
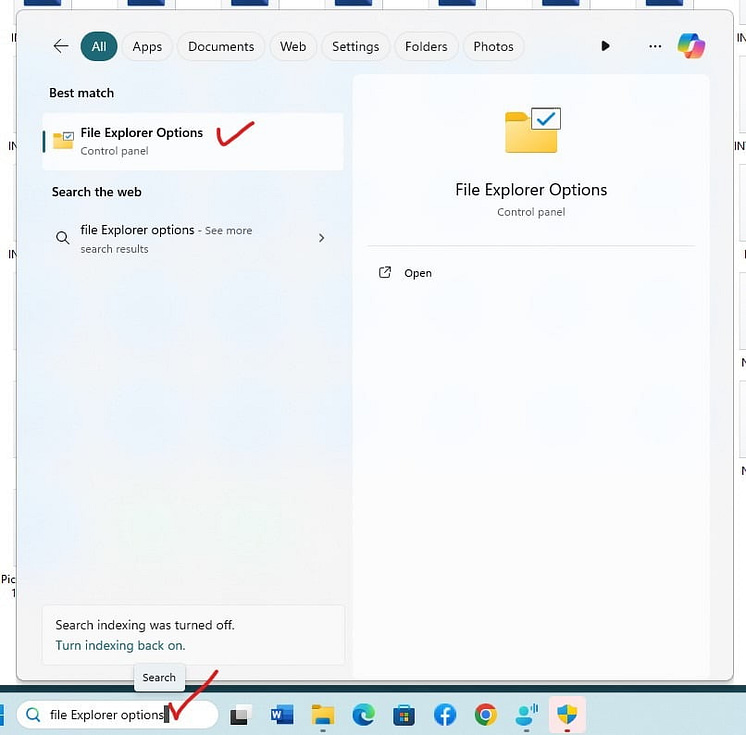
2. You can simply type File Explorer Options in the search box and press Enter. Otherwise, open File Explorer by clicking on the folder icon in the taskbar at the bottom of the window screen. You can also press the command Windows+E on your keyboard. In this method, we will type file explorer options in the search box.
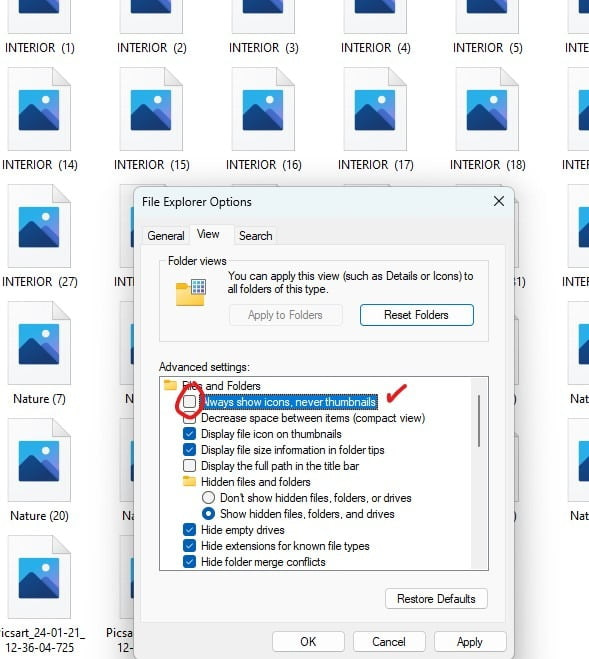
3. After clicking on File Explorer Options, you will see the View option. Click on it, and in Advanced Settings, click on Files and Folders. Uncheck the option “Always show icons, never thumbnails.“
4. When you uncheck the option “Always show icons, never thumbnails,” you cannot see the thumbnail previews because you have not clicked on the apply button yet.
5. When you click on the Apply option, you can now see thumbnail previews of images behind the File Explorer tab. Now one can identify the desired images quickly. At last, click on the OK button.
6. Now, you can preview images in large and extra-large mode by clicking the keyboard command (Ctrl+Shift+2). For an extra-large preview, enter the command (Ctrl+Shift+1).
If you are facing an issue such as “my video download preview thumbnails are not showing”, you can also fix that by using the above methods.
- How to Fix Software Crash
- How to Resolve Blue Screen of Death (BSOD) Errors
- How To Delete Temporary Files From My Laptop or PC (Further readings)
Previews that are corrupted need to be fixed
In Windows 10 & 11, a cache of thumbnails remains in computer files for every one of his computers. When you clear this corrupted cache from your computer, it can resolve the issue of folder image previews that are not displaying properly. If you have tried enabling image previews many times, removing the cached thumbnail may resolve this problem.
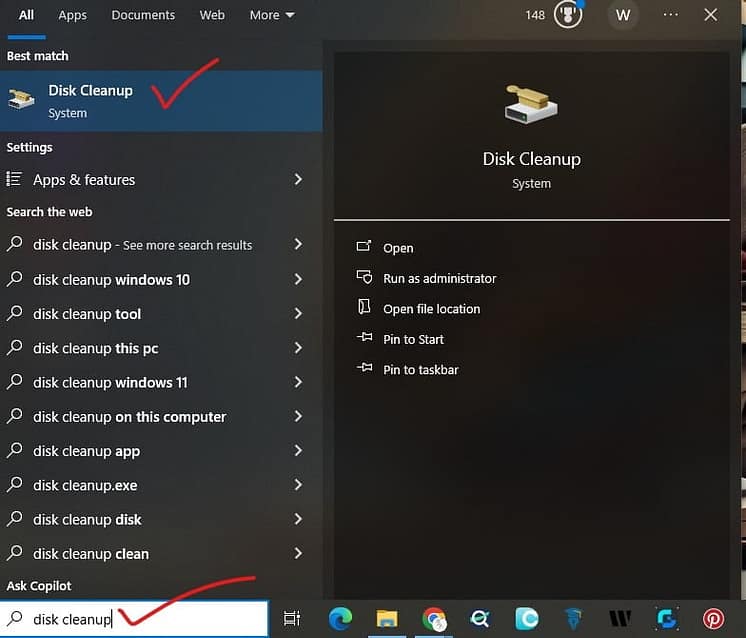
1. Go to the Search box and type Disk Cleanup. When you click on the Enter button, a new window will be opened, usually “Drive Selection.“
2. Here you will see all the drive letters C, D, E, F, etc. You have to select C drive. You can also select other disks if you want to empty your recycle bin.
3. A new window titled Disk Cleanup for (C 🙂 will open, and you will see many options. If some options are checked by default, you must make sure that your Thumbnails option is checked. Then, you must press the OK button.
4. Then, a pop-up will be displayed: “Are you sure you want to permanently delete these files?” You must click on the Delete Files option.
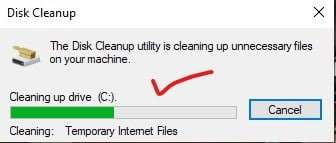
5. The green line shows that your cache files are being deleted now. You have to wait for two to three minutes. When all the thumbnail cache is deleted, the pop-up will disappear automatically. You can now check the thumbnail previews. I hope the problem will be resolved now.
Conclusion:
In conclusion, I can say that seeing the thumbnail previews is very easy for everyone who is at the beginner level. This article is for every user who doesn’t know how to fix this problem. In some settings, you can overcome this problem. You have to just check the “Always show icons, never thumbnails” option in File Explorer to resolve this issue. If you are facing this problem yet, then you have to make sure that you have deleted all the corrupted cache of thumbnails in Disk Cleanup.
FAQ’S
There are common reasons that the preview of images cannot be shown, including incorrect file folder settings, a corrupted thumbnail cache, or outdated graphics drivers.
No, it does not delete your important data. It just deletes the cache of files stored in memory.
Tools like CCleaner can manage and clear thumbnail caches effectively

